Top 8 Picks: Spec Comparison Table
When you’re not sure which kit to choose, the first thing to check is how well the age range and difficulty level match up. If a kit is too hard, kids give up halfway through. Too easy, and they lose interest fast. Use the table below to narrow your options down to 2–3 candidates before diving into the details.
Quick Reference: Age Range, Difficulty & Price
| Product | Recommended Age | Difficulty | Price Range (tax incl.) | Key Highlight |
|---|---|---|---|---|
| BBC micro:bit v2 | 8+ | ★★☆ | ¥3,000–¥5,000 | Built-in sensors open up a wide range of projects |
| Arduino Uno Starter Kit | 12+ | ★★★ | ¥3,000–¥8,000 | Great for kids ready to tackle real electronics |
| Raspberry Pi Pico | 12+ | ★★★ | ¥800–¥2,000 (board only) | A serious microcontroller at a budget-friendly price |
| LEGO Education SPIKE Essential | 7+ | ★☆☆ | See official website | The perfect introduction to visual programming |
| Makeblock mBot2 | 10+ | ★★☆ | See official website | Robot control and sensor experiments all in one |
| Makey Makey | 7+ | ★☆☆ | ¥5,000–¥8,000 | Turn everyday objects into controllers — seriously fun |
| Gakken Electronic Blocks EX | 8+ | ★★☆ | See official website | Learn circuit basics intuitively — no soldering required |
| Scratch (+ micro:bit or Makey Makey) | 6+ | ★☆☆ | Free software (hardware sold separately) | The ideal first step for complete beginners |
A note on pricing: For the Raspberry Pi Pico and Arduino, prices vary significantly between the board alone and a full starter kit (with components). The prices listed here reflect a ready-to-use setup. They may differ from the lowest board-only prices available.
Recommended Kits by Project Theme
If you already have a project idea in mind, it’s smarter to work backwards from your theme — it’s the best way to avoid picking the wrong kit.
| What You Want to Do | Recommended Kit | Why |
|---|---|---|
| Measure and log temperature & humidity | micro:bit v2 | Temperature sensor is built right into the board |
| Build and control a robot | mBot2 / LEGO SPIKE | Motor control is ready to go out of the box |
| Explore how electric circuits work | Gakken Electronic Blocks EX | Circuit connections are visually clear by design |
| Create your own game or animation | Scratch (software only) | No hardware needed — start today |
| Turn everyday objects into “instruments” | Makey Makey | Works with fruit, water, and other conductors as-is |
| Get serious about coding long-term | Arduino / Raspberry Pi Pico | Uses languages and environments found in real-world development |
The kit that shows up in both your theme and age range is almost always your best bet. Head to the next section to read detailed reviews of each product.

Why Programming Kits Make Great Science Fair Projects
Every year, countless families struggle to come up with a good science fair topic. Classic experiments and nature observation journals are always options, but in recent years, programming and electronics kits have been gaining serious traction as project ideas.
And it’s not just because they’re trendy. The way schools evaluate projects has shifted significantly over the past few years.
3 Reasons They Stand Out in School Evaluations
Since programming became a required subject in Japanese elementary schools in 2020 — and was further emphasized in middle school technology and home economics classes in 2021 — the criteria for evaluating science fair projects have evolved. Teachers now look for things like: “Can I see the student’s trial-and-error process?” and “Did they define their own problem and try to solve it?”
3 qualities of a well-evaluated science fair project:
- A clear flow of hypothesis → experiment → conclusion
- Documentation of failures and how they were addressed
- An explanation of “why” in the student’s own words
Programming kits naturally check all three boxes. The cycle of “code doesn’t work → investigate why → fix and retry” maps directly onto the inquiry process — and it’s all documented as you go.
Why Electronics Projects Count as “Inquiry-Based Learning”
Japan’s Ministry of Education promotes “proactive, interactive, and deep learning” (known as active learning), which emphasizes the process of asking questions, testing ideas, and reflecting on results — over memorizing facts. Hands-on electronics projects are one of the few learning experiences that let students genuinely feel this inquiry cycle.
This is arguably the biggest advantage of electronics kits — these steps happen naturally as part of the process. Unlike an observation journal, you end up with something you actually built, which makes your presentation that much more compelling.
4 Tips for Choosing the Right Kit
“We bought it and it was way too hard.” “It was too easy and we got bored.” — these are common regrets with kit purchases. If you narrow things down along four axes — age and experience, budget, language type, and support resources — you can almost eliminate the risk of a bad fit.
Difficulty Guidelines by Age and Experience
Recommended age ranges are just a starting point. What really matters is whether or not your child has any prior programming experience. A third-grader who’s been using Scratch for two years can handle a product aimed at sixth-graders just fine.
| Age Range | Experience Level | Best Fit Style |
|---|---|---|
| 6–8 | Complete beginner | Tile-based controls, robot driving |
| 9–11 | Some Scratch experience | Visual language + sensor integration |
| 12+ | Ready to try text-based coding | MicroPython, Arduino |
Visual vs. Text-Based Languages: How to Choose
Visual languages like Scratch and MakeCode use drag-and-drop blocks, so there are no typos or syntax errors to worry about. Text-based languages like Python and C require kids to read and understand error messages, which raises the risk of getting stuck.
- If the project window is 1–2 weeks or less → prioritize a visual language
- If there’s no time pressure from exams or other commitments → text-based languages are worth trying
- If the goal is to eventually get into serious coding → look for a kit with a clear path to text-based programming
Price-to-Value Comparison by Budget
Kits generally fall into three price tiers. Factor in the cost of add-on parts when thinking about long-term value.
- Under ¥3,000: Single-purpose or entry-level robots. Fine if you’re just looking for a taste of the experience.
- ¥3,000–¥8,000: Mid-range kits that come with sensors and expansion parts. Versatile enough to use again the following year.
- ¥8,000+: Microcontroller board plus a full sensor set. These can double for school projects or clubs, making the per-use cost very reasonable over time.
Japanese Language Support and Community Strength
Many imported products are feature-rich but only have English documentation. If your child or you get stuck, hunting down answers in another language adds real friction. Check whether the product has an active Japanese community, a Japanese website, or a social media presence before buying.
Before purchasing, search “[product name] + how to use” and see if at least 10 personal blogs or videos come up — that’s a good sign there’s enough support out there. Also check whether the official site has a Japanese FAQ or a contact form.
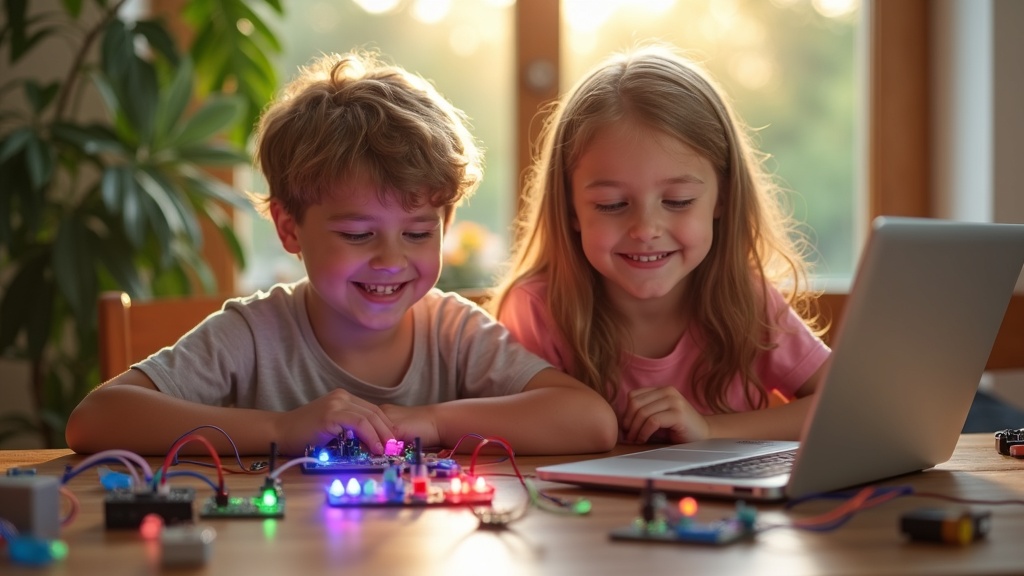
For Early Elementary Schoolers: 2 Kits That Are Easy to Jump Into
Not having to write a single line of code is a huge relief for younger kids. The kits in this category are designed around a short feedback loop — arrange blocks, see results, watch things move — so kids get that sense of accomplishment before they have a chance to lose interest.
Based on the selection tips above, for kids in grades 1–4 with no prior programming experience, your top priority should be a kit with immediate visual or physical feedback.
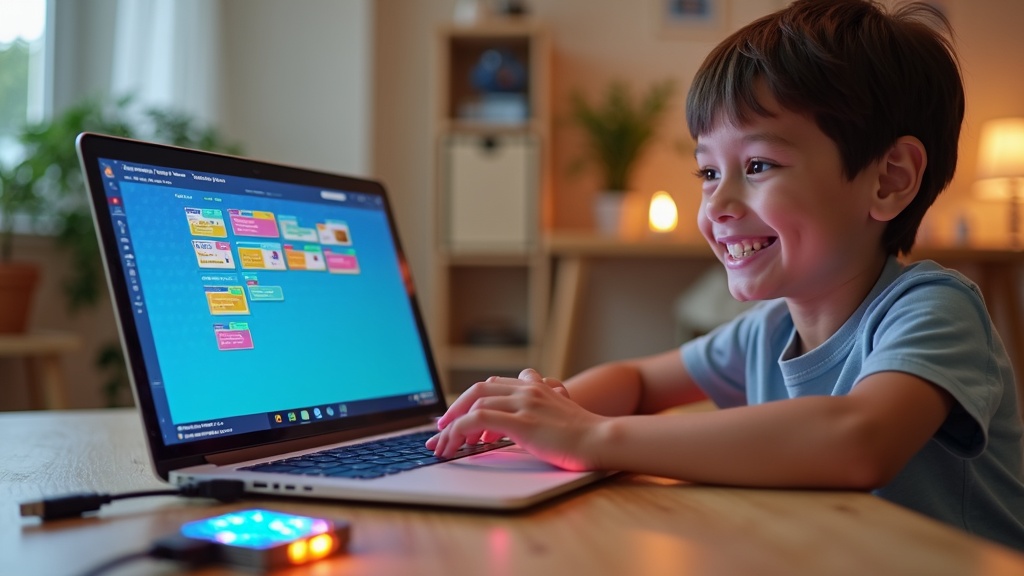
BBC micro:bit V2 Go | Start Your Electronics Journey with Block Coding
Developed with input from UK educational institutions, this microcontroller board is used in elementary schools around the world. You can do all the basics — displaying text on the built-in LED matrix, playing sounds, reading the tilt sensor — entirely through MakeCode, a browser-based visual programming environment. Programming is as simple as connecting a USB cable to your PC, which keeps the barrier to entry low.
- Grow with the platform: start with visual blocks, then progress to MicroPython, then JavaScript
- The V2 adds an onboard speaker and microphone; the Go set includes a battery pack so you don’t have to worry about power
- Extensive Japanese official guides and school curriculum materials make it easy for parents to help
Keep in mind: The board alone doesn’t give you much to “build.” Adding a breadboard and some LED components opens up a lot more possibilities. At first, kids may find themselves just working through the pre-set activities.
Makeblock mBot Neo | See Your Code Come to Life Through a Robot
This robot kit arrives almost fully assembled and can be controlled right away via Bluetooth through a tablet or smartphone app. Using mBlock — a Scratch-compatible block coding environment — you can program behaviors like “stop when an obstacle is detected” or “play a sound when the light sensor triggers” in just a few minutes. The direct connection between “I wrote this code” and “the robot actually did that” is especially powerful for keeping younger kids engaged.
- Sensors are built in from the start — no extra parts needed to create a solid science fair project
- Wi-Fi support allows for firmware updates over the air
Keep in mind: It costs more than the micro:bit (check the official site for current pricing). And because it comes as a finished robot, there’s less of a hands-on “building circuits yourself” feel. That said, if your project theme is robot control, this is a very strong choice.
Both kits have a solid ecosystem of compatible parts and expansion modules, so they’ll stay useful long after the science fair is over. Check the official sites for the latest availability and pricing.
For the latest pricing and full specs on the Makeblock mBot Neo, check Amazon or the official website. It’s also worth looking into the range of compatible sensors and expansion parts available.
3 Kits for Upper Elementary to Middle Schoolers: Dive Into Real Electronics Projects
If you’re starting to think “I want to understand how circuits work and build something truly my own,” it’s time to level up to intermediate kits that combine sensors and modules. This section covers three serious picks that also make for richly detailed science fair projects.
Arduino Uno R4 Minima | Learn Circuit Design with the World-Standard Microcontroller Board
The Arduino Uno R4 Minima is the latest generation Arduino board, released in 2023. Powered by a 32-bit ARM Cortex-M4 core, it offers significantly more memory and processing power than the previous Uno R3. As the global standard platform used by developers worldwide, you’ll find a wealth of English tutorials, community forums, and sample code readily available online.
Who It’s Best For
- Those who want to try text-based coding with Arduino’s C-like language
- Anyone looking to run measurement experiments with temperature or ultrasonic sensors
- Students who want to build a solid foundation in electronics long-term
Honest Downside: This is a board-only purchase, so you’ll need to separately buy a breadboard, jumper wires, and sensors. It’s a good idea to estimate your total upfront costs before ordering. Check the official site or authorized retailers for pricing and compatible sensor details.
Check Amazon for current pricing and stock — you may find it discounted during sale events.
ELEGOO UNO R3 Starter Kit | Everything Included for Instant Experiments — Great Value
The ELEGOO UNO R3 is a starter kit that bundles an Arduino-compatible board with LEDs, resistors, various sensors, a breadboard, and everything else you need to start experimenting right away. The “buy it and get started immediately” convenience makes it especially well-suited for science fair projects.
Pros & Cons at a Glance
| Pros | Cons |
|---|---|
| Experiment across multiple project types without buying extra parts | Not an official Arduino board — some libraries may need compatibility checks |
| Comes with detailed English PDF manuals and tutorials | Component quality can vary between production batches |
Pricing varies by retailer and time of year, so it’s worth comparing a few shops before you buy.
Head to the Amazon product page to see exactly what’s included in the kit. With a large number of reviews, you’ll also find helpful feedback from parents who’ve worked through it with their kids.
LEGO Education SPIKE Essential | Spark Creativity with LEGO Bricks + Python
LEGO Education SPIKE Essential is an educational kit that blends the hands-on LEGO building experience with programming. It supports both visual block-based coding and Python, so kids can switch between learning levels depending on their coding experience.
Something to Keep in Mind: SPIKE Essential is primarily designed for grades K–5 (roughly early to mid elementary school). If your upper elementary or middle school student wants to tackle more advanced builds and programming challenges, the higher-tier SPIKE Prime is worth considering as well. Check the official site for pricing and what’s included.
One big advantage for science fair presentations: “The LEGO build itself becomes part of the finished project.” That visual appeal is a genuine strength when it comes to showing off your work. Be sure to browse the full lineup on the official site.
For age recommendations and current pricing, check the official site or authorized retailers. Since the set contents affect what types of projects you can build, it’s a good idea to match the kit to your child’s grade level before deciding.
Top 3 Kits for Middle and High Schoolers: Linux & Real-World Programming
If you’re thinking “Scratch is too easy now” or “I want to start building skills I can actually use in college or at work,” this is your next step. We’ve handpicked kits that let you get hands-on with technologies used in real development environments — from OS concepts and networking to sensor control.
The products in this section can be tricky for complete beginners. If you’ve already spent some time with Arduino or micro:bit and gotten comfortable writing and running programs, you’ll have a much smoother experience here.
Raspberry Pi 5 | The Top-of-the-Line Single-Board Computer
The Raspberry Pi 5 is the flagship model of the Linux-capable single-board computer lineup. It runs on the Broadcom BCM2712 chip with Arm Cortex-A76 cores, delivering a massive performance boost over the previous Pi 4.
The standard setup involves installing Raspberry Pi OS (a Debian-based Linux distro) and working from there — giving you a full-featured learning environment for terminal commands, Python scripting, and even Node.js web app development. It’s powerful enough to tackle advanced science fair projects like setting up and publishing your own web server.
Honest downside: The board alone won’t get you started — you’ll need a microSD card, power adapter, case, and other peripherals. Check the official site for total cost. Setup takes time, so if you buy it right before summer break, the configuration process will likely eat into your project time.
Check the official site or retailer listings for the latest pricing and availability. This is a kit that grows with your child over the long term, making it an especially strong pick for anyone serious about diving into programming and electronics.
M5Stack Core2 | Compact Embedded Development with a Modular Design
The M5Stack Core2 is a modular embedded development board built around the ESP32. It comes with a 2.0-inch IPS display, built-in battery, and speaker — all out of the box, ready to program the moment you open it.
You can choose your development environment based on your skill level: start with the visual block-based UIFlow, then move up to MicroPython, and eventually Arduino IDE (C++). This built-in learning curve makes it a genuinely well-designed educational tool. The magnetic module-stacking system also lets you add sensors and communication modules, giving you hands-on experience with hardware expansion.
Honest downside: Japanese-language tutorials and guides are limited compared to what’s available in English. When you get stuck, you’ll need to read English documentation and forums — which, on the flip side, is a great way to build the habit of reading technical English.
For full specs on the M5Stack Core2 — including its built-in display, sensors, Wi-Fi, and recommended age range — check the official product page. If you’re serious about electronics, it’s worth checking current pricing and stock at the same time.
IchigoJam BASIC Kit | A Japanese-Made Board for Understanding How Computers Really Work
IchigoJam is a Japanese-developed microcomputer board made by jig.jp, designed specifically for learning. The moment you power it on, it boots directly into an interactive BASIC programming environment — no OS, no middleware, just the bare minimum of what a computer needs to function.
You connect a keyboard via USB, type programs directly, and output to a display via HDMI or composite video. The experience of “turn it on and it’s immediately in BASIC” is strikingly similar to personal computers from the 1980s — and if you’re used to modern, abstracted programming environments, that simplicity might actually feel refreshing.
Honest downside: BASIC is rarely used in professional development today. This kit is best suited for those who want to understand how computers work at a fundamental level. If you’re building a portfolio for college or career purposes, pairing it with another kit from this list is recommended.
Specs and pricing can change, so be sure to check the official site and retailers before purchasing.

If you’re interested in building a computer from scratch starting with soldering, check the official site for the recommended age range and required tools.
IchigoJam BASIC Kit
Science Fair Project Ideas & Inspiration
Have you ever bought a kit only to find yourself wondering, “What am I actually supposed to make with this?” Here are some concrete project ideas you can submit as real science fair topics, organized by kit type.
Science Fair Project Ideas for micro:bit & Arduino
micro:bit and Arduino are excellent tools for the “collect data with sensors → analyze it” style of research. The ideas below all lend themselves well to a clear hypothesis-experiment-conclusion structure.
Recommended Project Topics
- Use a temperature/humidity sensor to record temperature differences across spots in your room over one week
- Use a light sensor to study how curtain color affects indoor brightness
- Use an ultrasonic sensor to test the relationship between distance and sound volume
- Use an accelerometer to compare the shock absorption of different materials
The real advantage here is that you can automate the entire process — from measurement to data logging to graphing. Compared to handwritten records, your data becomes more reliable and your report far more convincing.
This kit lets you explore advanced features like sensors and wireless communication at an accessible price point. If you’re interested, be sure to check the latest pricing and what’s included.
Science Fair Project Ideas for Raspberry Pi
With its camera module and networking capabilities, Raspberry Pi opens the door to more ambitious project topics. It’s a great fit for middle schoolers who want to go beyond the basics.
Advanced Project Ideas
- Use a camera + Python to automatically photograph a plant every day and compile a time-lapse video of its growth
- Build a DIY weather monitoring site that displays temperature and humidity sensor data in real time on a webpage
- Use a sound sensor to measure and visualize noise levels throughout the day
That said, Raspberry Pi can be tricky to set up without some basic knowledge of Linux. Realistically, it’s best to have a parent or teacher help with the initial environment setup before diving into the research itself.
Tips for Writing a Strong Research Report
Don’t just build something and call it done — articulating why things turned out the way they did is what really elevates your project.
Before you start, record your prediction in the format: “I think ___ will happen because ___.”
Plot sensor readings as line or bar charts in Excel or Google Sheets. Visualized trends are far easier to understand than raw numbers.
Don’t hide errors or unexpected results. Adding a discussion of why things went wrong actually strengthens the quality of your research.
Important: Simply pasting your program’s code into the report is not analysis. What matters is explaining in your own words what you were measuring with that code and what patterns emerged from the results.
Pre-Purchase Q&A
It’s not uncommon to hear people say, “I bought the kit but couldn’t figure out how to use it.” Clearing up your questions before you buy goes a long way toward avoiding post-purchase regret.
Do You Need a Separate Computer? What to Check
3 Things to Verify Before Buying
- PC required vs. standalone: Many Scratch-based visual programming kits run in a browser with no extra software, but some text-coding kits do require a computer
- Check supported operating systems: Most kits support both Windows and macOS, but some are Windows-only. Always check the “System Requirements” section on the official website
- Smartphone and tablet support: More kits — including micro:bit and mBot2 — now support control via a dedicated app on your phone. This is a great option for households without a PC
Can Kids Assemble and Program It on Their Own?
The short answer: if a child is one to two years older than the suggested age range, most kits are manageable independently. That said, “recommended age” doesn’t automatically mean “no adult help needed.”
Age-by-Age Guide to How Much Support Is Needed
- Ages 6–8: Plan to sit alongside your child and work through it together — think of it as a shared experience, not a solo task
- Ages 9–11: Many kids can follow the instructions and work mostly independently; step in only when they get stuck
- Ages 12+: Most kids can work largely on their own, and tend to develop the habit of looking up error solutions themselves
What Can You Do With the Kit After the Science Fair?
Whether the kit sees more than one summer of use comes down largely to which one you choose.
For example, micro:bit and Arduino can be repurposed long after the science fair — for projects like an automatic room temperature logger or a custom game controller. By contrast, kits designed around a specific theme tend to have limited expandability once the main build is done.
If you want something that will keep kids engaged long-term, go with a general-purpose microcontroller board. The learning curve is steeper than a prebuilt kit, but the range of things you can program with it is vastly larger. It’s also worth checking whether the kit comes with a solid library of official sample projects before you buy.
Summary: The Best Pick by Age & Goal
We’ve covered eight kits — but if you’re still asking “so which one should I actually get?”, here’s a quick breakdown by type. The decision comes down to three simple factors: your child’s age, their interests, and how much support you’re able to provide.
Quick Reference: Best Kit by Type
Kit Selection Checklist by Type
- Early elementary / first kit ever → Visual programming kit (Scratch-compatible, block-based coding)
- Upper elementary / loves games or animation → micro:bit or a Scratch extension kit
- Middle school / interested in science or circuits → Arduino Starter Kit
- Middle school and up / wants to write real code → Raspberry Pi beginner kit
- Parent-child project → Assembly-style robot kit with detailed instructions
Can’t Decide? Here’s Your Default Choice
If you’re still on the fence, the official micro:bit Starter Kit is the safest bet. It’s affordably priced, has a track record in school curricula, and comes with plenty of Japanese-language learning resources. Its biggest strength is that it stays useful well beyond the science fair.
Final Checklist Before You Buy
- Keep the recommended age in mind, but prioritize what your child is actually excited about
- Work backward from the submission deadline to confirm you have enough time to finish
- Check the manufacturer’s official site for support resources before purchasing
For the latest pricing and availability on each kit, check the manufacturer’s official site or retailer listings. We hope this science fair project becomes the spark that turns programming and electronics into something your child truly loves.