Why You Need Accessories for Your MacBook Air M5
“Not enough ports.” “Can’t charge while using an external display.” — Sound familiar? If you’ve just started using a MacBook Air, chances are you’ve run into these frustrations almost immediately. By design, the MacBook Air series intentionally limits its ports to stay thin and light. The M5 generation follows the same philosophy, which means there’s a hard cap on how many devices you can connect at once.
MacBook Air M5 Port Layout and What to Watch Out For
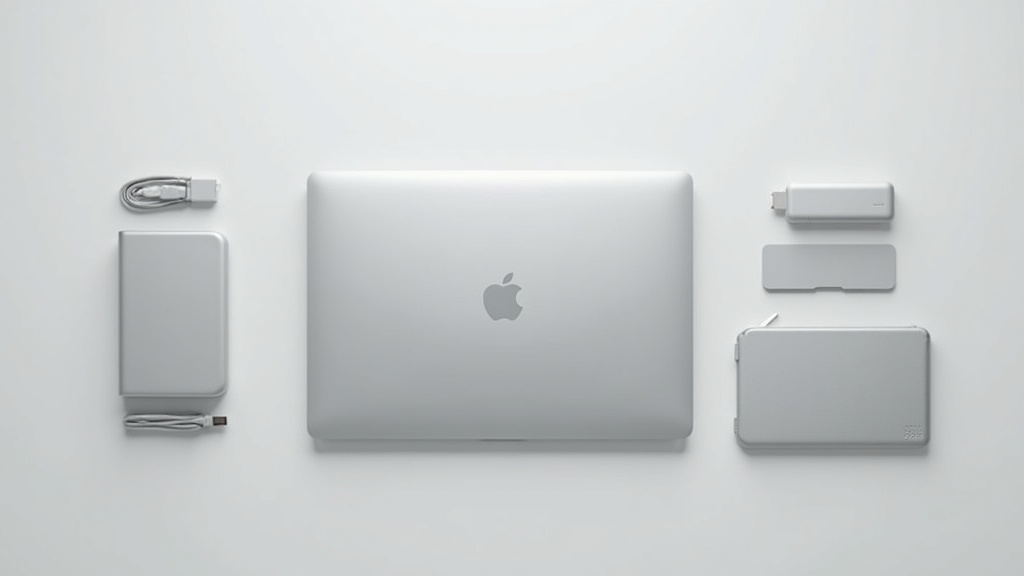
The MacBook Air M5 comes with two Thunderbolt / USB 4 USB-C ports, one MagSafe 3 charging port, and one 3.5mm headphone jack (check Apple’s official site for the full specs).
Heads up: Once you use your USB-C ports for an external display or USB devices, you’re effectively left with just one port for charging. If you always use MagSafe, this isn’t an issue — but if you’re out and only brought a USB-C charger, you’ll have to pick and choose what stays connected.
Try to connect wired ethernet, external storage, a mouse, and a display all at once, and you’ll quickly run out of ports with the stock configuration. That’s the main reason a USB-C hub is considered essential for MacBook Air users.
By Use Case: Which Accessories Should You Get First?
If you’re working with a limited budget, it makes sense to prioritize. Here’s a practical guide:
- Work from home / desk-focused users: USB-C hub (top priority) → monitor stand → external display
- On-the-go / café workers: Sleeve case (top priority) → compact USB-C hub
- Creative work (video/photo editing): USB-C hub (top priority) → external SSD → cooling stand
Just adding a single hub will solve most of your connectivity issues right away. Stands and cases can wait — figure out what you actually need as you go.
Top 10 MacBook Air M5 Accessories: Side-by-Side Comparison
As we covered above, the MacBook Air M5 is limited to two USB-C ports. In this section, we’ve narrowed it down to 10 standout products and organized them by category, use case, and price range. If you’re not sure where to start, use this table to get the full picture at a glance.
How to Read the Table and How We Chose These Products
We applied three criteria when selecting these products:
- Compatibility with the M5 chip — USB-C and Thunderbolt 4 support
- Size and weight — matters differently depending on whether you’re mobile or desk-bound
- Price range balance — covering budget-friendly options all the way up to pro-grade gear
| Category | Product | Primary Use | Estimated Price | Best For |
|---|---|---|---|---|
| USB-C Hub | ① Anker 552 USB-C Hub (9-in-1) | HDMI, SD card, wired ethernet | $40–$55 | Those who need multi-port access on the go |
| USB-C Hub | ② Belkin Connect Pro 12-in-1 | Dual monitors + simultaneous charging | $100–$140 | Power users with a permanent desk setup |
| Docking Station | ③ CalDigit TS4 | Full Thunderbolt 4 utilization | ~$350 | Multiple 4K monitors and high-speed storage users |
| Laptop Stand | ④ Majextand M | Lightweight, portable use | $55–$70 | Café and coworking space regulars |
| Laptop Stand | ⑤ Twelve South Curve Flex | Height-adjustable, desk use | $70–$95 | Work-from-home users looking to improve posture |
| Case / Sleeve | ⑥ tomtoc Slim Case (13-inch compatible) | Daily commute and travel | $20–$35 | Those who want lightweight and value for money |
| Case / Sleeve | ⑦ Incase ICON Sleeve | Cushioning and impact protection | $50–$65 | Frequent travelers worried about bumps and drops |
| Monitor | ⑧ LG 27UK850-W (4K, USB-C charging) | Desk work, video review | $350–$420 | Creative professionals and developers |
| Keyboard | ⑨ Logitech MX Keys Mini | Space-saving, multi-device | $70–$90 | Users who switch between multiple devices |
| Mouse | ⑩ Logitech MX Master 3S | Feature-rich, extended use | $90–$110 | Business users who rely heavily on mouse input |
※ Prices are based on major online retailers at the time of writing and are subject to change. Always check the latest prices before purchasing.
Recommended Combinations by Use Case
You don’t need everything on this list. Knowing the right minimal setup for your needs will save you from unnecessary spending. Here are three practical configurations based on real-world usage:
In the next sections, we’ll go through each product in detail — pros, cons, and honest takes included.
Top 3 USB-C Hubs & Docks
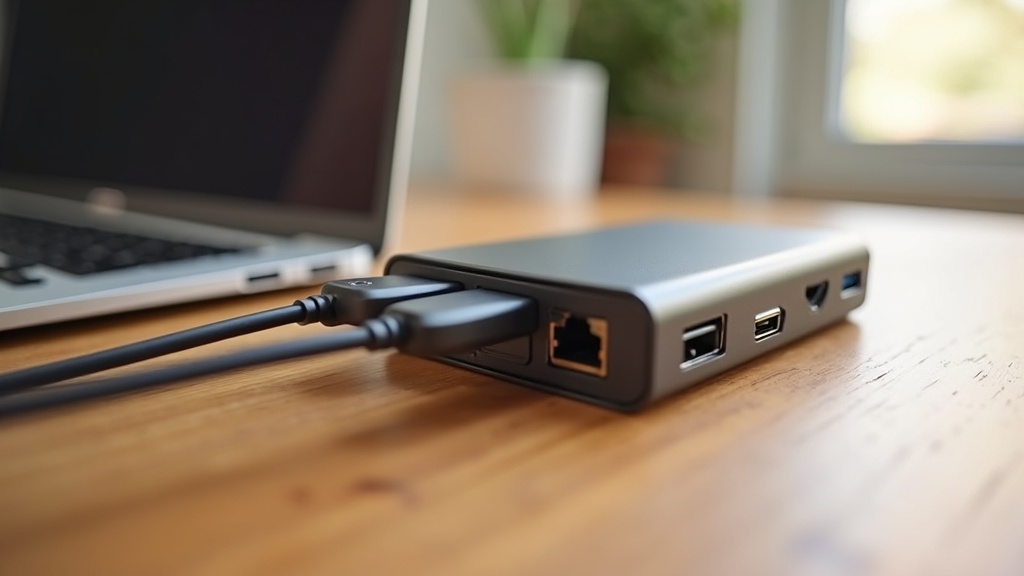
The MacBook Air M5 only has two USB-C ports, which fills up fast the moment you need an external display, wired ethernet, and an SD card reader all at once. The practical solution is to match your hub or dock to your use case.
Hub vs. Dock: What’s the difference?
A hub is bus-powered and draws power from your USB-C port — portable and convenient. A dock uses its own AC adapter to deliver stable power and a larger port selection. Go with a dock for a permanent desk setup, and a hub for on-the-go use.
Anker 563 USB-C Hub (10-in-1): The Best Value All-Rounder
This bus-powered hub packs 10 ports into one — including HDMI output, USB-A 3.2, USB-C PD, SD/microSD card slots, and wired ethernet — making it a solid companion for working at cafes or on the road. Anker’s reputation for quality control holds up here, and user reviews consistently rate its stability highly.
- Plenty of ports for coffee shop or on-location work
- Bus-powered design makes it easy to throw in a bag
- Supports 4K HDMI output
Heads up: Using many ports simultaneously can cause the hub to run warm. You’ll get the most out of it if you think of it as a travel hub rather than a permanent desk fixture. Check the official site or Amazon listing for current specs and pricing.
If you want to declutter your workspace by consolidating everything into one cable, check the latest price and full specs for the Anker 563.
CalDigit TS4 Thunderbolt 4 Dock: The Pro Pick for Full Desktop Power
Built for serious desk setups, this dock delivers 40Gbps bandwidth via Thunderbolt 4 and offers 18 ports in total. You can run multiple displays while simultaneously connecting storage drives and audio gear — making it the ideal choice for a permanent home office or office workstation.
- Thunderbolt 4 connection for fast, rock-solid performance
- Delivers up to 98W charging output to your host device
- Includes SD card slot with UHS-II support
Downsides: It’s pricey, and noticeably larger and heavier than a bus-powered hub — not something you’d want to pack in a bag. If you’re not planning to keep it on a desk full-time, it’s probably overkill.
Check Amazon for the latest pricing and stock availability. It’s worth reviewing the full specs to confirm compatibility with the MacBook Air M5 and see exactly which ports you’ll have access to.
Satechi Slim Aluminum Multi-Port Adapter V3: For the Design-Conscious Minimalist
This slim adapter stands out for its aluminum build in Space Gray and Silver — colorways designed to match your MacBook’s finish. Its low-profile design means it slides into even the thinnest bags without adding bulk.
- Matches the MacBook’s aesthetic for a clean, unified look
- Slim enough to fit comfortably in any bag
- Simple port selection that covers everyday needs
Heads up: It has fewer ports than the Anker 563. If you need to run an external display and wired ethernet at the same time, you’ll hit its limits quickly. It’s best suited for light users who just need two or three extra ports. Check the official site for the latest specs and pricing.

Pricing and availability for the Satechi Slim V3 can shift quickly across retailers, so if you’re interested, it’s worth checking multiple storefronts at once. Its slim form factor adds a solid port expansion without the bulk — just verify the specs against your MacBook Air M5 setup before buying.
Top 4 Stands for MacBook Air M5
Ever finish a long work session with a stiff neck or sore shoulders? Simply raising your MacBook screen to eye level with a stand can improve your posture and help the machine run cooler at the same time. Here are four picks organized into three categories: desktop, portable, and ultra-slim.
Rain Design mStand: The Classic Aluminum Desktop Stand That Looks Great on Any Desk
Machined from a single block of aluminum, the mStand blends seamlessly with MacBook’s design and keeps your desk looking clean. Non-slip rubber pads on the base keep it firmly in place.
Pros: Rock-solid build with zero wobble / Cable management channel underneath / Looks like it was made for Apple products
Cons: Fixed height with no adjustment / Too heavy to carry around
If you’re happy leaving a stand on your desk permanently, the mStand is a timeless choice that will serve you for years.
If aesthetics matter as much as function, check Amazon for current pricing and compatibility details.
Twelve South Curve: The Height-Adjustable Stand for Anyone Dealing with Neck or Shoulder Pain
This curved aluminum stand is designed to bring your screen up to a comfortable eye level. The Curve Flex model adds height and tilt adjustment so you can dial in the perfect position for your body type and chair height.
- Promotes a neutral head position so you’re not constantly hunching forward
- Creates space underneath for storing an external keyboard
- Improves airflow around the M5 chip for better thermal management
Height adjustment is only available on the Curve Flex — the standard Curve is fixed height. Double-check the model name before purchasing.
Curious about pricing or availability for the Twelve South Curve? Check the latest listings and read real buyer reviews to see the wood-grain finish and stability for yourself.
Nexstand K2: The Foldable Portable Stand for Frequent Travelers and Café Workers
The Nexstand K2 collapses down small enough to slip into a bag’s side pocket, making it a great travel companion. It offers multiple height settings so you can adjust on the fly depending on your chair and table setup.
Pros: Lightweight and highly portable / Adjustable height / Budget-friendly price
Cons: Plastic build lacks a premium feel / Can wobble slightly on uneven surfaces
If you split your time between home and out-of-office locations, this stand hits the sweet spot between value and convenience.
Check the latest pricing and full specs for the foldable Nexstand K2 on its product page before you buy.
Majextand: The Ultra-Thin Built-In Stand That Sticks Right to Your MacBook
The Majextand attaches directly to the bottom of your MacBook. Pop it open and the laptop tilts up, creating airflow underneath — no separate stand to remember or dig out of your bag.
- Nearly zero added thickness — as portable as it gets
- Instantly improves ventilation and helps manage heat when deployed
- Limited height range makes it less effective for posture correction
If your priority is traveling light and you don’t mind sticking something to your MacBook, head over to the official site to review the specs.
For detailed specs and real-world impressions of the Majextand, the official product page covers compatible models, folded dimensions, and everything else you’d want to check before buying.
Top 3 Cases & Sleeves for MacBook Air M5
Once you’ve set up a comfortable workspace with a stand, it’s time to think about protecting your MacBook Air M5 on the go. The M5’s slim, lightweight design is one of its best features — but it also means the surface can scratch easily when it rubs against other items in your bag. The key is choosing between two types: a soft sleeve or a hard shell case, depending on how you use it.
Tomtoc 360 Protective Laptop Sleeve: Best Soft Sleeve for All-Around Protection
If you’re constantly pulling your laptop in and out of bags, the Tomtoc sleeve is a great fit. It features proprietary corner guards that distribute impact from drops, and the interior fleece lining keeps your MacBook’s surface scratch-free.
Pros: Practical corner protection with impressive cushioning despite being slim
Cons: Sleeve only — you’ll need a separate pouch for accessories like your power adapter
This is one of the most popular sleeves for daily commuters, with consistently strong ratings and review counts on Amazon. Check the latest price and availability if you’re interested.
Tomtoc 360 Protective Laptop Sleeve
UAG MacBook Air Hard Shell Case: Use It While Wearing It
If you frequently open your laptop right at a coffee shop or on the go without taking off the case, a hard shell is the way to go. UAG’s case uses polycarbonate and is designed to leave the MacBook’s ventilation slots fully open, so heat can escape freely.
Pros: No need to put on or take off — just open and work
Cons: Adds some weight, so it’s not ideal if keeping things ultralight is a priority
If you want a balance of drop protection and low weight, check out the specs and pricing for the UAG MacBook Air Hard Shell Case.
Incase Hardshell Case: Slim, Lightweight, and Minimal
The Incase Hardshell Case is one of the thinnest options available, preserving the MacBook Air’s original silhouette almost entirely. A dot-pattern interior provides airflow to prevent heat buildup. This one is perfect for anyone who loves clean aesthetics or wants to keep the look of their MacBook as close to stock as possible.
Pros: Incredibly thin and light — lets the MacBook’s design shine through
Cons: Less impact absorption than UAG; not the best choice if you’re rough on your gear
For the latest pricing and availability, check the official site or retailers like Amazon and Rakuten.
If you’re curious about color options and current stock for the Incase Hardshell Case, check the official product page before buying — it comes in multiple colors to match your MacBook Air’s finish, so it’s worth browsing the lineup first.
How to Choose the Right Accessories for MacBook Air M5
Now that you’ve got protection covered, it’s time to tackle the bigger question: which accessories should you actually buy first? To avoid spending your whole budget on something that doesn’t fit how you work, here are three key factors to consider.
Home Setup vs. Mobile Use: Your Workflow Determines What Comes First
The first thing to nail down is where you’ll be using your MacBook Air M5 most. The priority order for accessories is completely different depending on whether you’re primarily at a desk or always on the move.
Home/Desk Setup Priority Order
- USB-C hub or dock (port expansion is the top priority)
- Monitor stand or external display
- External keyboard and mouse
Mobile/On-the-Go Priority Order
- Slim, lightweight USB-C hub (built for portability)
- Charging cables and a compact charger
- Laptop stand (foldable style)
For a desk setup, a multi-port dock gives you the best value. But if you’re mostly mobile, lugging around a heavy dock just adds unnecessary weight to your bag.
Budget Planning: A Phased Approach to Building Your Setup
Honestly, you don’t need to buy everything at once. Building your setup in stages actually helps you figure out what you truly need.
STEP 1
Start here (around $35)
One USB-C hub. This single purchase solves HDMI output, limited USB ports, and missing card reader slots all at once.
STEP 2
Next step (up to ~$100)
A monitor stand or laptop stand. The difference in neck and shoulder strain during long work sessions is immediately noticeable.
STEP 3
When budget allows (over ~$200)
Add a Thunderbolt 4 dock, external display, or external SSD based on your specific needs.
Does Thunderbolt 4 Compatibility Actually Matter?
The MacBook Air M5 does support Thunderbolt 4. But that doesn’t mean every accessory you buy needs to be Thunderbolt 4 compatible.
When Thunderbolt 4 makes a real difference
- Driving 4K or 8K external displays
- High-speed external SSDs (you’ll notice the transfer speed improvement)
- Heavy data workflows like video editing or music production
When USB-C (USB 3.2) is perfectly fine
- Web browsing, document work, and video calls
- Outputting to a Full HD display
- Connecting a mouse or keyboard
For lighter use cases, a standard USB-C hub works just fine. Since Thunderbolt 4 accessories tend to cost more, it’s worth matching your choice to your actual workload rather than defaulting to the most expensive option.
Frequently Asked Questions (FAQ)
Can M3/M4 accessories work with the M5?
Q. I bought a hub and case for my old MacBook Air — will they still work with the M5?
As long as the connection standard is USB-C, you should be able to use them without any issues. USB-C is physically compatible across generations, so hubs and docks purchased for the M3 or M4 will work just fine with the M5.
That said, if you’re planning to use accessories that support newer standards like Thunderbolt 5, keep in mind that older cables may become a bottleneck. Cases and stands will generally fit if the dimensions match — just be sure to verify the exact measurements for the M5 model on Apple’s official website.
Does charging speed slow down when using a USB-C hub?
Q. Is charging slower when going through a hub instead of plugging in directly?
With hubs that support PD (Power Delivery) passthrough, a portion of the wattage is consumed to power the hub itself, which reduces how much actually reaches your laptop. The typical overhead is around 15W — so if you plug in a 70W adapter, your MacBook will receive roughly 55W.
If fast charging is a priority, plugging directly into MagSafe is the better choice. The practical approach is to use MagSafe for charging and treat the hub as an expansion tool for when you’re actively working.
Can I connect multiple external displays?
Q. Is a dual-display setup possible?
MacBook Air models tend to have more limitations on external display output compared to desktop-class chips. For the M5’s official display output specs, the most reliable source is Apple’s website.
That said, docking stations equipped with a DisplayLink chip can work around native hardware limitations and support multiple displays. Just keep in mind that a dedicated driver installation is required, and some apps may have compatibility issues with DisplayLink.
Note: Specs and supported standards may change depending on when a product was released. Always check the Apple official website for the latest information before purchasing.

Summary: Best Accessory Combinations by Use Case
The trickiest part of choosing accessories is figuring out what to pair together. Here are three common use cases, each with an ideal setup. Use these as a starting point for planning your budget.
Work-from-Home Setup: The Winning Combo of a Dock + Fixed Stand
For a permanent desk setup, pairing a USB-C dock (docking station) with a fixed-angle stand is the most productivity-boosting combination. The ideal configuration lets you connect your MacBook with a single cable while handling an external monitor, wired LAN, and peripherals all at once.
Recommended Setup for Working from Home
- USB-C docking station (with HDMI, wired LAN, and multiple USB-A ports)
- Fixed aluminum stand (with adjustable height and angle)
- External keyboard + mouse (for clamshell mode use)
Raising your MacBook to eye level with a stand significantly reduces neck strain during long work sessions. The combined cost of a dock and stand is relatively manageable, and you can build out your setup gradually based on budget.
On-the-Go / Café Setup: The Essential Trio of Lightweight Hub + Portable Stand + Sleeve
For those who want to keep their bag light, narrowing it down to these three items is the most practical approach. Packing too many accessories adds weight and can actually discourage you from taking your setup out at all.
Recommended Mobile Setup
- Slim, lightweight hub (keep it focused: USB-A ×2 + HDMI ×1 is plenty)
- Foldable portable stand (around 100g — metal for the best balance of durability and weight)
- Slim sleeve case (fits MacBook Air 13-inch, water-resistant preferred)
A compact portable stand that works on the tight tables at cafés is one you’ll actually use. For sleeves, look for ones that can also function as a laptop compartment inside a backpack — that versatility makes them well worth it.
For Creators and Video Editors
Since fast transfers to external storage are essential, prioritize a hub with USB4 or Thunderbolt support above all else. Pair that with a large vertical stand to improve airflow and keep temperatures in check during long rendering sessions — this combination leads to the most stable performance over time.